Translate

Sunday 23 November 2014

Restoring Flash Drive Files or Ones Emptied from Recycle Bin


Step 1

Open your Web browser and download a free undelete application that lets you restore files deleted from USB flash drives or those emptied from the Recycle Bin. Free applications such Pandora Recovery, EaseUS Free USB Flash Drive Data Recovery and Easy File Undelete provide relatively easy-to-use interfaces that allow you recover and restore all types of deleted files from USB flash drives and external hard drives -- even those you already emptied from the Windows Recycle Bin (links in Resources.) Save the downloaded file in a folder on your computer.

Step 2

Click the Start button, then "Computer." Browse to the folder where you saved the undelete program setup file. Double-click the file and follow the prompts to install the application. Restart your computer if the setup wizard prompts you to do so.

Step 3

Connect the USB hard drive or flash drive to your computer and wait a few seconds for Windows to detect and initialize it automatically.

Step 4

Open the undelete application on your computer. Select the drive letter associated with the USB flash drive or external hard drive that contains deleted files you want to recover. Click the "Next" or "Search" button and then wait for the application to search the drive for deleted or changed file indexes and tables that indicate which files marked for deletion and removal. Depending on the size of the drive and the number of files on it -- both active and deleted ones -- the search for deleted files on the device may take only a few minutes or it might take a couple of hours. After the file search completes, the undelete programs displays a list of deleted filenames. Some applications might also display a graphic or icon of some sort indicating the chances of successful file recovery.

Step 5

Select the file or files on the USB drive that you want to recover. Click the "Recover To" or "Save In" drop-down box and select the folder on your primary system hard drive to which you want to save files you recover from the USB drive. Click the "Start," "Recover" or "Undelete" button and wait as the undelete software attempts to recover the deleted files and copy them to the selected folder. After the program completes the recovery and copy process, it displays a message providing details of which files it recovered successfully and those it could not restore.

Tips

  • You can improve your chances of a successful recovery considerably if you run an undelete application immediately after deleting files inadvertently. The longer you wait to attempt recovery of the files, the less your chances of being able to restore them. Chances for a successful recovery diminish even further if you write or copy other files to the USB hard drive before running the undelete program. To ensure the best possible chance of recovery, download, install and run the undelete program as soon as you realize you deleted the needed files.

Warnings

  • You can use the Restore function in Recycle Bin only for external USB hard drives and not flash drives. Windows treats flash drives as temporary storage devices and does create a Recycle Bin partition on them for storing deleted files. If you delete a file from a flash drive, the process bypasses the Recycle Bin and marks the file for removal immediately. If you copy a new file to the flash drive, Windows treats the area occupied by the file marked for removal just as it would any other free space on the device.

Temporarily Remove Write Protection through the Drive Letter


Step 1

Click the "Start" button and then select "Computer." Right-click the icon for the USB drive (labeled as "Removable Disk") and select “Properties.”

Step 2

Click the “Sharing” tab and click the “Advanced Sharing” button.

Step 3

Click the “Permissions” button to access the list of permissions. Select the “Full Control” check box under Allow for full read, write and change permissions. Click "OK" twice and click "Close."

Remove Write Protection through the Registry

Step 1

Click the “Start” button, type “regedit” (without the quotation marks) in the Search Programs and Files box and press "Enter" to open the Registry Editor.

Step 2

Navigate to “HKEY_LOCAL_MACHINE\SYSTEM\CurrrentControlSet\Control\StorageDevicePolicies.” Right-click "WriteProtect" and select "Modify." Change the Value Data to “0” and click "OK."

Step 3

Add “StorageDevicePolicies” if it does not exist. Select the "Control" folder in the left navigation pane. On the “Edit” menu, point to “New” and click “Key.” Type “StorageDevicePolicies” (without quotation marks) and press "Enter." Right-click in the right pane, point to "New" and select "DWORD (32-Bit) Value." Type “WriteProtect” (without quotation marks) and press "Enter." Close the Registry Editor.

Tips


  • If the USB flash drive does not appear on the Computer page, refresh the screen or reboot the computer until it does. If the USB flash drive does not eventually appear, it may be defective. Try opening it on another computer before discarding it. Make sure the USB drive is not open and no other programs are using it.

Warnings


  • Remember to back up the registry before completing the steps. The “Format” command permanently deletes all data from the drive. Save what you want before formatting the drive.

Permanently Remove Write Protection


Step 1

Insert the USB flash drive into a USB 2.0 port and turn on your computer. Click the "Start" button and then select "Computer." Note the drive letter of the USB drive, which is labeled as "Removable Disk."

 Step 2

Click “Start | All Programs | Accessories | Command Prompt” to open a Command Prompt window.

 Step 3

Type the drive letter assigned to the USB drive followed by a colon; for example, type "E:" (without quotation marks). Press “Enter.”

 Step 4

Type “format” and the drive letter followed by a colon; for example, type "format E:" (without quotation marks). Press "Enter."

  Step 5

Close the Command Prompt window when the operation is complete. Write protection has been removed from the USB drive.

Saturday 20 September 2014

Hack Windows Explorer For Efficiency Boosts


Windows Explorer — known as File Explorer on Windows 8 — is an application that you probably spend a good amount of time in. Even Windows geeks that avoid using any other Microsoft program tend to use Windows Explorer instead of a third-party file manager. But, while we spend time customizing our browser with extensions, we often don’t think about hacking our file manager. There are a lot of ways you can customize Windows Explorer to make your file management experience faster and more efficient.
We won’t dwell on Windows Explorer’s built-in options here — just the most interesting ways you can go off the beaten track and do things that aren’t obvious.

Add Copy To Folder And Move To Folder

With a quick registry hack, you can add “Copy to Folder” and “Move to Folder” entries to your Windows Explorer context menu. You’ll be able to right-click on files or folders and select the Copy To Folder or Move To Folder options. Selecting either option will open a window where you can choose your preferred destination folder, simplifying the file copying and moving process.
To do this, simply download the .reg file for your preferred option from the Seven Forums website — either Add_Copy_To_Folder.reg or Add_Move_To_Folder.reg — and double-click it. Windows will add the information to your registry and display the options in your context menu.

Edit Your Send To Menu

The Send To menu allows you to right-click files or folders and easily perform an operation on them. By default, you can send a document to your desktop, compress it, email it to someone, and more. But you aren’t just limited to the options hat appear here by default. Your Send To menu is actually just a folder, and you can open it to easily add your own custom shortcuts and delete the shortcuts that already exist there.
To open the Send To folder on Windows 7 or 8, press Windows Key + R to open the Run dialog, type shell:sendto, and press Enter. After you’ve opened the folder, copy shortcuts you want to use to the folder. If you want to remove shortcuts from the Send To menu, just delete them from the folder.

Customize Your Context Menu

Windows Explorer’s context menu, or right-click menu, becomes cluttered over time as you install more and more software. You can normally uninstall the associated programs to get rid of their right-click menu entries, but what if you’d prefer to leave them installed? You can use a tool like CCleaner to remove options you don’t use from your right-click menu, making it more minimal and less cluttered.
CCleaner doesn’t list all context menu entries.
If you’d rather add custom shortcuts to your context menu, you can do that by using a program like FileMenu Tools.

Change Your Default Folder

On Windows 7, Windows Explorer opens to your Libraries folder whenever you open it. But maybe you don’t use libraries, or perhaps you just use a different folder more often instead.
Microsoft doesn’t make this option obvious, but you can easily change the default Windows Explorer folder to your preferred folder by editing your taskbar’s Windows Explorer shortcut. Whenever you launch Windows Explorer, you’ll see the folder you chose. We like making the Downloads folder the default folder, giving you easy access to your recently downloaded files, but you should choose whatever folder you use most.
To do this, right-click the Windows Explorer (or File Explorer) shortcut on your taskbar, right-click Windows Explorer in the jump list that appears, and select Properties. Add the path of your preferred folder to the end of the Shortcut box.

Add Tabs

Apple’s Finder is getting tabs in OS X Mavericks, and Linux file managers have had tabs for a long time. But Windows Explorer is still without tabs, even on Windows 8. Internet Explorer was the last big browser to get tabs, and it seems that Windows Explorer will be the last big file manager to get tabs — if it ever does.
While you can replace Windows Explorer with tabbed file managers, you don’t have to switch to a new file manager just for this small feature. Third-party tools like QTTabBar can add tabs to Windows Explorer, giving you the ability to have several folders open in the same file browsing window.

Improve File Copying

The file-copy dialog on Windows 7 and previous versions of Windows isn’t very good. It’s slow, has trouble dealing with file conflicts, and doesn’t allow you to pause file operations. If there’s a file conflict or another problem, the file-copy dialog will stop in its tracks and wait for your input rather than continuing and dealing with conflicts later. Windows 8 improved on this, but you don’t have to upgrade to Windows 8 just to get a better file-copying experience.
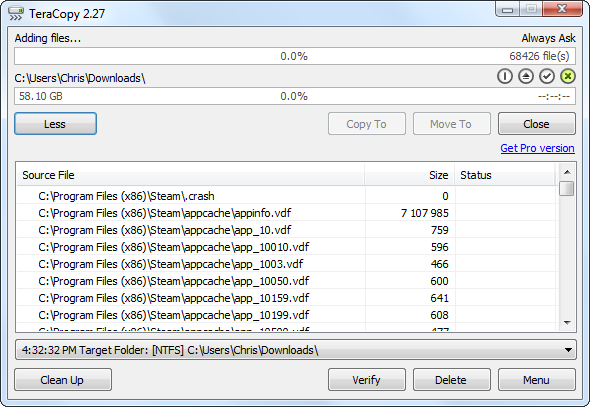
To get an improved file-copy dialog, just install TeraCopy and enable its Explorer integration options. Whenever you copy or move files in Windows Explorer — either with drag and drop or copy and paste — TeraCopy will leap into action and perform the file-copying instead. This effectively rips out Windows’ poor file-copy dialog and gives you a much better one. You can disable the integration in the future if you’d like to use the standard file-copy dialog.
TeraCopy also adds itself to your context menu as an option, so you can launch it only when you want it and use the standard file-copy dialog most of the time, if you prefer.

Do you have any other useful tips for hacking away at Windows Explorer? Leave a comment and share them!

History Of Hacking - A Review Of Term "Hacking"


Hacking has been around for more than a century. In the 1870s, several teenagers were flung off the country's brand new phone system by enraged authorities. Here's a peek at how busy hackers have been in the past 35 years.

Early 1960s

University facilities with huge mainframe computers, like MIT's artificial intelligence lab, become staging grounds for hackers. At first, "hacker" was a positive term for a person with a mastery of computers who could push programs beyond what they were designed to do.

Early 1970s

John Draper John Draper makes a long-distance call for free by blowing a precise tone into a telephone that tells the phone system to open a line. Draper discovered the whistle as a give-away in a box of children's cereal. Draper, who later earns the handle "Captain Crunch," is arrested repeatedly for phone tampering throughout the 1970s.


Yippie social movement starts YIPL/TAP (Youth International Party Line/Technical Assistance Program) magazine to help phone hackers (called "phreaks") make free long-distance calls.

Two members of California's Homebrew Computer Club begin making "blue boxes," devices used to hack into the phone system. The members, who adopt handles "Berkeley Blue" (Steve Jobs) and "Oak Toebark" (Steve Wozniak), later go on to found Apple Computer.

Early 1980s

Author William Gibson coins the term "cyberspace" in a science fiction novel called Neuromancer.

In one of the first arrests of hackers, the FBI busts the Milwaukee-based 414s (named after the local area code) after members are accused of 60 computer break-ins ranging from Memorial Sloan-Kettering Cancer Center to Los Alamos National Laboratory.

Comprehensive Crime Control Act gives Secret Service jurisdiction over credit card and computer fraud.

Two hacker groups form, the Legion of Doom in the United States and the Chaos Computer Club in Germany.

2600: The Hacker Quarterly is founded to share tips on phone and computer hacking.

Late 1980s

The Computer Fraud and Abuse Act gives more clout to federal authorities.

Computer Emergency Response Team is formed by U.S. defense agencies. Based at Carnegie Mellon University in Pittsburgh, its mission is to investigate the growing volume of attacks on computer networks.

At 25, veteran hacker Kevin Mitnick secretly monitors the e-mail of MCI and Digital Equipment security officials. He is convicted of damaging computers and stealing software and is sentenced to one year in prison.

First National Bank of Chicago is the victim of a $70-million computer heist.

An Indiana hacker known as "Fry Guy" -- so named for hacking McDonald's -- is raided by law enforcement. A similar sweep occurs in Atlanta for Legion of Doom hackers known by the handles "Prophet," "Leftist" and "Urvile."

Early 1990s


After AT&T long-distance service crashes on Martin Luther King Jr. Day, law enforcement starts a national crackdown on hackers. The feds nab St. Louis' "Knight Lightning" and in New York grab Masters of Deception trio "Phiber Optik," " Acid Phreak" and "Scorpion." Fellow hacker "Eric Bloodaxe" is picked up in Austin, Texas.

Operation Sundevil, a special team of Secret Service agents and members of Arizona's organized crime unit, conducts raids in 12 major cities, including Miami.

A 17-month search ends in the capture of hacker Kevin Lee Poulsen ("Dark Dante"), who is indicted for stealing military documents.

Hackers break into Griffith Air Force Base, then pewwwte computers at NASA and the Korean Atomic Research Institute. Scotland Yard nabs "Data Stream," a 16-year-old British teenager who curls up in the fetal position when seized.

A Texas A&M professor receives death threats after a hacker logs on to his computer from off-campus and sends 20,000 racist e-mail messages using his Internet address.

Kevin Mitnick [photo / AP ]In a highly publicized case, Kevin Mitnick is arrested (again), this time in Raleigh, N.C., after he is tracked down via computer by Tsutomu Shimomura at the San Diego Supercomputer Center.

Late 1990s

Hackers break into and deface federal Web sites, including the U.S. Department of Justice, U.S. Air Force, CIA, NASA and others.

Report by the General Accounting Office finds Defense Department computers sustained 250,000 attacks by hackers in 1995 alone.

A Canadian hacker group called the Brotherhood, angry at hackers being falsely accused of electronically stalking a Canadian family, break into the Canadian Broadcasting Corp. Web site and leave message: "The media are liars." Family's own 15-year-old son eventually is identified as stalking culprit.

Hackers pierce security in Microsoft's NT operating system to illustrate its weaknesses.

Popular Internet search engine Yahoo! is hit by hackers claiming a "logic bomb" will go off in the PCs of Yahoo!'s users on Christmas Day 1997 unless Kevin Mitnick is released from prison. "There is no virus," Yahoo! spokeswoman Diane Hunt said.

1998

Anti-hacker ad runs during Super Bowl XXXII. The Network Associates ad, costing $1.3-million for 30 seconds, shows two Russian missile silo crewmen worrying that a computer order to launch missiles may have come from a hacker. They decide to blow up the world anyway.

In January, the federal Bureau of Labor Statistics is inundated for days with hundreds of thousands of fake information requests, a hacker attack called "spamming."

Hackers break into United Nation's Children Fund Web site, threatening a "holocaust" if Kevin Mitnick is not freed.

Hackers claim to have broken into a Pentagon network and stolen software for a military satellite system. They threaten to sell the software to terrorists.

The U.S. Justice Department unveils National Infrastructure Protection Center, which is given a mission to protect the nation's telecommunications, technology and transportation systems from hackers.

Hacker group L0pht, in testimony before Congress, warns it could shut down nationwide access to the Internet in less than 30 minutes. The group urges stronger security measures.

Hacker Ethic is a term that was first used in Hackers: Heroes of the Computer Revolution written by American journalist Steven Levy in 1984. The ideology behind hacker ethics came from the values of the hackers at the MIT Artificial Intelligence Laboratory.

"Access to computers - and anything which might teach you something about the way the world works - should be unlimited and total. Always yield to the Hands-on Imperative!"

"All information should be free."
Mistrust authority- promote decentralization."

"Hackers should be judged by their hacking, not bogus criteria such as degrees, age, race, or position."

"You can create art and beauty on a computer."


"Computers can change your life for the better."

Basic Backtrack 5 Commands For Beginners


Hi Guys,Now A Days I Was Planning To Write Some Tutorial On Backtrack But Then I Think Of Newbies It Will Be Difficuilt For Them To
Get What’s Going.So, In This Post I Will Be Telling You About Backtrack Basic Commands.

I Have Divided Them Into Some Categories I Suggest You To Learn Them Because They Are Very UseFul If You Have Any Problem Just Leave A Comment We Will Help You Soon:))

 File Operations

pwd                  Print Name Of Current/Working Directory
cd                     Changing The Working Directory
cp                     Copy Files Or Directory
rm                    Remove Files And Directory
ls                       List Of Directory Contents
mkdir                 Make Directory
cat                    Concatenate Files And Print On Standard Output
mv                    Move Files
chmod              Change Files Permissions

Know Your System

uname            Print System Information
who                Show Who Is Logged On
cal                    Displays Calculator
date                 Print System Date And Time
df                      Report File System Disk Space Usage
du                     Estimate File Space Usage
ps                     Displays Information Of Current Active Processes
kill                    Allows To Kills Process
clear                Clear The Terminal Screen
cat /proc/           cpuinfo Display CPU Information
cat /proc/meminfo                 Display Memory Information

Compression

tar                     To Store And Extract Files From An Archive File Known As Tar File
gzip                  Compress Or Decompress Named Files

Network
ifconfig            To Config Network Interface
ping                  Check The Other System Are Reachable From The Host System
wget                 Download Files From Network
ssh                    Remote Login Program
ftp                     Download/Upload Files From/To Remote System
last                   Displays List Of Last Logged In User
telnet                Used To Communicate With Another Host Using THe Telnet Protocol

Searching Files

grep                 Search Files(s) For Specific Text
find                  Search For Files In A Directory Hierarchy
locate              Find Files By Name

Hope You Like It.Give Your Valuable Feedback At ..........

Amazing Google Facts You Probably Didn’t Know


American Dialect Society members voted ‘google’ to be the most useful word of the year in 2012. And Google is probably still one of the most useful and influential companies in the world. Let’s learn something about this fantastic phenomenon of our modern world in this infographic from Promodo.


Google Is Bigger Than You Realize -Indepth Server Comparison


Gizmodo has posted a visual representation from Intac showing the approximate number of dedicated servers that major tech companies own. When you speak in terms of numbers, it becomes hard to comprehend just how large these server farms have become. Intel, for example, is estimated to have around 100,000 servers in its arsenal, while Facebook, AT&T, and Time Warner Cable, all fall between 20,000 and 30,000. Without being able to see these server farms with your own eyes, these statistics are merely tossed aside as nothing more than interesting facts.

It's no secret that Google is a giant. But, do people realize just how big they really are? Companies like Microsoft, Amazon, and eBay all have over 50,000 servers, though their exact numbers aren't made public. Google, by comparison, is estimated to have over 1,000,000 dedicated servers, accounting for over 2% of the servers in the world. The graphical representation below allows one to truly understand just how unbelievably huge Google is (especially compared to the other major tech giants). Get your scroll-wheel ready and take a look.


Sunday 7 September 2014

What is the BIOS ?

BIOS Setup Utility Main Menu Example -

The Basic Input Output System, usually referred to as BIOS, is software stored on a small memory chip on the motherboard.
BIOS is sometimes incorrectly referred to as the Basic Integrated Operating System.

What is the BIOS Used For?

BIOS instructs the computer on how to perform a number of basic functions such as booting and keyboard control.
BIOS is also used to identify and configure the hardware in a computer such as the hard drive, floppy drive, optical drive, CPU, memory, etc.

How To Access BIOS


The BIOS is accessed and configured through the BIOS Setup Utility. The BIOS Setup Utility is, for all reasonable purposes, the BIOS itself. All available options in BIOS are configurable via the BIOS Setup Utility.
The BIOS Setup Utility is accessed in various ways depending on your computer or motherboard make and model. See How To Access the BIOS Setup Utility for help.

How To Use BIOS

BIOS contains a number of hardware configuration options that can be changed through the setup utility. Saving these changes and restarting the computer applies the changes to the BIOS and alters the way BIOS instructs the hardware to function.
Here are some common things you can do in most BIOS systems:
  • Change the Boot Order
  • Load BIOS Setup Defaults
  • Remove a BIOS Password
  • Create a BIOS Password
  • Change the Date and Time
  • Change Floppy Drive Settings
  • Change Hard Drive Settings
  • Change CD/DVD/BD Drive Settings
  • View Amount of Memory Installed
  • Change the Boot Up NumLock Status
  • Enable or Disable the Computer Logo
  • Enable or Disable the Quick Power On Self Test (POST)
  • Enable or Disable the CPU Internal Cache
  • Enable or Disable the Caching of BIOS
  • Change CPU Settings
  • Change Memory Settings
  • Change System Voltages
  • Enable or Disable RAID
  • Enable or Disable Onboard USB
  • Enable or Disable Onboard IEEE1394
  • Enable or Disable Onboard Audio
  • Enable or Disable Onboard Floppy Controller
  • Enable or Disable Onboard Serial/Parallel Ports
  • Enable or Disable ACPI
  • Change the ACPI Suspend Type
  • Change the Power Button Function
  • Change Power-on Settings
  • Change Which Display is Initialized First on Multi-Display Setups
  • Reset Extended System Configuration Data (ESCD)
  • Enable or Disable BIOS Control of System Resources
  • Change Fan Speed Settings
  • View CPU and System Temperatures
  • View Fan Speeds
  • View System Voltages

Useful RUN Commands !


1. Accessibility Controls - access.cpl
2. Accessibility Wizard - accwiz
3. Add Hardware Wizard - hdwwiz.cpl
4. Add/Remove Programs - appwiz.cpl
5. Administrative Tools - control admintools
6. Automatic Updates - wuaucpl.cpl
7. Bluetooth Transfer Wizard - fsquirt
8. Calculator - calc
9. Certificate Manager - certmgr.msc
10. Character Map - charmap
11. Check Disk Utility - chkdsk
12. Clipboard Viewer - clipbrd
13. Command Prompt - cmd
14. Component Services - dcomcnfg
15. Computer Management - compmgmt.msc
16. Control Panel - control
17. Date and Time Properties - timedate.cpl
18. DDE Shares - ddeshare
19. Device Manager - devmgmt.msc
20. Direct X Troubleshooter - dxdiag
21. Disk Cleanup Utility - cleanmgr
22. Disk Defragment - dfrg.msc
23. Disk Management - diskmgmt.msc
24. Disk Partition Manager - diskpart
25. Display Properties - control desktop
26. Display Properties - desk.cpl
27. Dr. Watson System Troubleshooting Utility - drwtsn32
28. Driver Verifier Utility - verifier
29. Event Viewer - eventvwr.msc
30. Files and Settings Transfer Tool - migwiz
31. File Signature Verification Tool - sigverif
32. Findfast - findfast.cpl
33. Firefox - firefox
34. Folders Properties - control folders
35. Fonts - control fonts
36. Fonts Folder - fonts
37. Free Cell Card Game - freecell
38. Game Controllers - joy.cpl
39. Group Policy Editor (for xp professional) - gpedit.msc
40. Hearts Card Game - mshearts
41. Help and Support - helpctr
42. HyperTerminal - hypertrm
43. Iexpress Wizard - iexpress
44. Indexing Service - ciadv.msc
45. Internet Connection Wizard - icwconn1
46. Internet Explorer - iexplore
47. Internet Properties - inetcpl.cpl
48. Keyboard Properties - control keyboard
49. Local Security Settings - secpol.msc
50. Local Users and Groups - lusrmgr.msc
51. Logs You Out Of Windows - logoff
52. Malicious Software Removal Tool - mrt
53. Microsoft Chat - winchat
54. Microsoft Movie Maker - moviemk
55. Microsoft Paint - mspaint
56. Microsoft Syncronization Tool - mobsync
57. Minesweeper Game - winmine
58. Mouse Properties - control mouse
59. Mouse Properties - main.cpl
60. Netmeeting - conf
61. Network Connections - control netconnections
62. Network Connections - ncpa.cpl
63. Network Setup Wizard - netsetup.cpl
64. Notepad - notepad
65. Object Packager - packager
66. ODBC Data Source Administrator - odbccp32.cpl
67. On Screen Keyboard - osk
68. Outlook Express - msimn
69. Paint - pbrush
70. Password Properties - password.cpl
71. Performance Monitor - perfmon.msc
72. Performance Monitor - perfmon
73. Phone and Modem Options - telephon.cpl
74. Phone Dialer - dialer
75. Pinball Game - pinball
76. Power Configuration - powercfg.cpl
77. Printers and Faxes - control printers
78. Printers Folder - printers
79. Regional Settings - intl.cpl
80. Registry Editor - regedit
81. Registry Editor - regedit32
82. Remote Access Phonebook - rasphone
83. Remote Desktop - mstsc
84. Removable Storage - ntmsmgr.msc
85. Removable Storage Operator Requests - ntmsoprq.msc
86. Resultant Set of Policy (for xp professional) - rsop.msc
87. Scanners and Cameras - sticpl.cpl
88. Scheduled Tasks - control schedtasks
89. Security Center - wscui.cpl
90. Services - services.msc
91. Shared Folders - fsmgmt.msc
92. Shuts Down Windows - shutdown
93. Sounds and Audio - mmsys.cpl
94. Spider Solitare Card Game - spider
95. SQL Client Configuration - cliconfg
96. System Configuration Editor - sysedit
97. System Configuration Utility - msconfig
98. System Information - msinfo32
99. System Properties - sysdm.cpl
100. Task Manager - taskmgr
101. TCP Tester - tcptest
102. Telnet Client - telnet
103. User Account Management - nusrmgr.cpl
104. Utility Manager - utilman
105. Windows Address Book - wab
106. Windows Address Book Import Utility - wabmig
107. Windows Explorer - explorer !

Friday 5 September 2014

Run Multiple Commands In One Go


Our final trick of the day is one that many command line geeks may already know, the
ability to run multiple command at once by linking them with double ampersands.
You can do this with any commands and you can link up as many as you want:
 
ipconfig && netstat

View Your Hard Drive's Entire Directory Structure

Directory Structure with Tree Command - Command Prompt Tricks
I think one of the neatest little commands is the tree command. With tree, you can create a kind of map of your computer's directories.
Execute tree from any directory to see the folder structure under that directory.
Tip: With so much information, it's probably a good idea to export the results of the tree command to a file. For example, tree /a > c:\treeresults.txt,

Save a Command's Output to a File

Command Output - Command Prompt Tricks
An incredibly useful Command Prompt trick is the use of redirection operators, specifically the > and >> operators.
These little characters let you redirect the output of a command to a file, giving you a saved version of whatever data the command produced in the Command Prompt window.
Let's say you're about to post a computer problem to an online forum, like my computer support forum for example, and you want to provide really accurate information about your computer. An easy way to do that would be to use the systeminfo command with a redirection operator.
For example, you might execute systeminfo > c:\mycomputerinfo.txtto save the information provided by the systeminfo command to a file. You could then attach the file to your forum post.

Become a Command Prompt Power User with Function Keys


Command Prompt Function Keys - Command Prompt Tricks
The fact that the function keys actually do something in the Command Prompt is maybe one of the best kept secrets about the tool:
F1: Pastes the last executed command (character by character)
F2: Pastes the last executed command (up to the entered character)
F3: Pastes the last executed command
F4: Deletes current prompt text up to the entered character
F5: Pastes recently executed commands (does not cycle)
F6: Pastes ^Z to the prompt
F7: Displays a selectable list of previously executed commands
F8: Pastes recently executed commands (cycles)
F9: Asks for the number of the command from the F7 list to paste
Command Prompt Trick #17 is full of arrow key shortcuts, a few of which are similar to these function key tricks.

Know if someone is hacking your computer/ Trace a Hacker


Want to know if someone is hacking your computer? Command Prompt can help you find if someone you don't know is connected to your computer stealing private data. Just execute netstat -a and the command prompt will return a list of computers that your computer is connected to. In the results returned, Proto column gives the type of data transmission taking place (TCP or UDP) , Local address column gives the port with which your computer is connected to an external computer and the Foreign Address column gives the external computer you are connected to along with the port being used for the connection. State gives the state of the connection (whether a connection is actually established, or waiting for transmission or is “Timed Out”).

Windows CMD Commands - CMD Network Commands


This document is under the: GNU Free Documentation License

Windows  CMD  (Command prompt) DOS

The Windows Command line interface can be accessed by running the CMD.exe that is located in the "system32" folder in you Windows folder.

The most common way to access this interface is to type "cmd" in the run dialoge box, then click the ok button

The most common basic & advanced commands in alphabetical order are:

A

ADDUSERS Add or list users to/from a CSV file
   ARP      Address Resolution Protocol
   ASSOC    Change file extension associations*
   ASSOCIAT One step file association
   ATTRIB   Change file attributes
B
   BOOTCFG  Edit Windows boot settings
   BROWSTAT Get domain, browser and PDC info
C
   CACLS    Change file permissions
   CALL     Call one batch program from another*
   CD       Change Directory - move to a specific Folder*
   CHANGE   Change Terminal Server Session properties
   CHKDSK   Check Disk - check and repair disk problems
   CHKNTFS  Check the NTFS file system
   CHOICE   Accept keyboard input to a batch file
   CIPHER   Encrypt or Decrypt files/folders
   CleanMgr Automated cleanup of Temp files, recycle bin
   CLEARMEM Clear memory leaks
   CLIP     Copy STDIN to the Windows clipboard.
   CLS      Clears command screen*
   CLUSTER  Windows Clustering
   CMD      Start a new CMD shell
   COLOR    Change colors of the CMD window*
   COMP     Compare the contents of two files or sets of files
   COMPACT  Compress files or folders on an NTFS partition
   COMPRESS Compress individual files on an NTFS partition
   CON2PRT  Connect or disconnect a Printer
   CONVERT  Convert a FAT drive to NTFS.
   COPY     Copy one or more files to another location*
   CSCcmd   Client-side caching (Offline Files)
   CSVDE    Import or Export Active Directory data
D
   DATE     Display or set the date*
   DEFRAG   Defragment hard drive
   DEL      Delete one or more files*
   DELPROF  Delete NT user profiles
   DELTREE  Delete a folder and all subfolders
   DevCon   Device Manager Command Line Utility
   DIR      Display a list of files and folders*
   DIRUSE   Display disk usage
   DISKCOMP Compare the contents of two floppy disks
   DISKCOPY Copy the contents of one floppy disk to another
   DISKPART Disk Administration
   DNSSTAT  DNS Statistics
   DOSKEY   Edit command line, recall commands, and create macros
   DSADD    Add user (computer, group..) to active directory
   DSQUERY  List items in active directory
   DSMOD    Modify user (computer, group..) in active directory
   DSRM     Remove items from Active Directory
E
   ECHO     Display message on screen*
   ENDLOCAL End localisation of environment changes in a batch file*
   ERASE    Delete one or more files*
   EXIT     Quit the current script/routine and set an errorlevel*
   EXPAND   Uncompress files
   EXTRACT  Uncompress CAB files
F
   FC       Compare two files
   FIND     Search for a text string in a file
   FINDSTR  Search for strings in files
   FOR /F   Loop command: against a set of files*
   FOR /F   Loop command: against the results of another command*
   FOR      Loop command: all options Files, Directory, List*
   FORFILES Batch process multiple files
   FORMAT   Format a disk
   FREEDISK Check free disk space (in bytes)
   FSUTIL   File and Volume utilities
   FTP      File Transfer Protocol
   FTYPE    Display or modify file types used in file extension associations*
G
   GLOBAL   Display membership of global groups
   GOTO     Direct a batch program to jump to a labelled line*
H
   HELP     Online Help
I
   iCACLS   Change file and folder permissions
   IF       Conditionally perform a command*
   IFMEMBER Is the current user in an NT Workgroup
   IPCONFIG Configure IP
K
   KILL     Remove a program from memory
L
   LABEL    Edit a disk label
   LOCAL    Display membership of local groups
   LOGEVENT Write text to the NT event viewer.
   LOGOFF   Log a user off
   LOGTIME  Log the date and time in a file
M
   MAPISEND Send email from the command line
   MBSAcli  Baseline Security Analyzer.
   MEM      Display memory usage
   MD   or MKDIR    Create new folders*
   MKLINK   Create a symbolic link (linkd)
   MODE     Configure a system device
   MORE     Display output, one screen at a time
   MOUNTVOL Manage a volume mount point
   MOVE     Move files from one folder to another*
   MOVEUSER Move a user from one domain to another
   MSG      Send a message
   MSIEXEC  Microsoft Windows Installer
   MSINFO   Windows NT diagnostics
   MSTSC    Terminal Server Connection (Remote Desktop Protocol)
   MUNGE    Find and Replace text within file(s)
   MV       Copy in-use files
N
   NET      Manage network resources
   NETDOM   Domain Manager
   NETSH    Configure Network Interfaces, Windows Firewall & Remote access
   NETSVC   Command-line Service Controller
   NBTSTAT  Display networking statistics (NetBIOS over TCP/IP)
   NETSTAT  Display networking statistics (TCP/IP)
   NOW      Display the current Date and Time
   NSLOOKUP Name server lookup
   NTBACKUP Backup folders to tape
   NTRIGHTS Edit user account rights
P
   PATH     Display or set a search path for executable files*
   PATHPING Trace route plus network latency and packet loss
   PAUSE    Suspend processing of a batch file and display a message*
   PERMS    Show permissions for a user
   PERFMON  Performance Monitor
   PING     Test a network connection
   POPD     Restore the previous value of the current directory saved by PUSHD*
   PORTQRY  Display the status of ports and services
   POWERCFG Configure power settings
   PRINT    Print a text file
   PRNCNFG  Display, configure or rename a printer
   PRNMNGR  Add, delete, list printers set the default printer
   PROMPT   Change the command prompt*
   PsExec     Execute process remotely
   PsFile     Show files opened remotely
   PsGetSid   Display the SID of a computer or a user
   PsInfo     List information about a system
   PsKill     Kill processes by name or process ID
   PsList     List detailed information about processes
   PsLoggedOn Who's logged on (locally or via resource sharing)
   PsLogList  Event log records
   PsPasswd   Change account password
   PsService  View and control services
   PsShutdown Shutdown or reboot a computer
   PsSuspend  Suspend processes
   PUSHD    Save and then change the current directory*
Q
   QGREP    Search file(s) for lines that match a given pattern.
R
   RASDIAL  Manage RAS connections
   RASPHONE Manage RAS connections
   RECOVER  Recover a damaged file from a defective disk.
   REG      Registry: Read, Set, Export, Delete keys and values
   REGEDIT  Import or export registry settings
   REGSVR32 Register or unregister a DLL
   REGINI   Change Registry Permissions
   REM      Record comments (remarks) in a batch file*
   REN      Rename a file or files*
   REPLACE  Replace or update one file with another
   RD or RMDIR      Delete folder(s)*
   RMTSHARE Share a folder or a printer
   ROBOCOPY Robust File and Folder Copy
   ROUTE    Manipulate network routing tables
   RUNAS    Execute a program under a different user account
   RUNDLL32 Run a DLL command (add/remove print connections)
S
   SC       Service Control
   SCHTASKS Schedule a command to run at a specific time
   SCLIST   Display NT Services
   SET      Display, set, or remove environment variables*
   SETLOCAL Control the visibility of environment variables*
   SETX     Set environment variables permanently
   SHARE    List or edit a file share or print share
   SHIFT    Shift the position of replaceable parameters in a batch file*
   SHORTCUT Create a windows shortcut (.LNK file)
   SHOWGRPS List the NT Workgroups a user has joined
   SHOWMBRS List the Users who are members of a Workgroup
   SHUTDOWN Shutdown the computer
   SLEEP    Wait for x seconds
   SLMGR    Software Licensing Management (Vista/2008)
   SOON     Schedule a command to run in the near future
   SORT     Sort input
   START    Start a program or command in a separate window*
   SU       Switch User
   SUBINACL Edit file and folder Permissions, Ownership and Domain
   SUBST    Associate a path with a drive letter
   SYSTEMINFO List system configuration
T
   TASKLIST List running applications and services
   TASKKILL Remove a running process from memory
   TIME     Display or set the system time*
   TIMEOUT  Delay processing of a batch file
   TITLE    Set the window title for a CMD.EXE session*
   TLIST    Task list with full path
   TOUCH    Change file timestamps  
   TRACERT  Trace route to a remote host
   TREE     Graphical display of folder structure
   TYPE     Display the contents of a text file*
U
   USRSTAT  List domain usernames and last login
V
   VER      Display version information*
   VERIFY   Verify that files have been saved*
   VOL      Display a disk label*
W
   WHERE    Locate and display files in a directory tree
   WHOAMI   Output the current UserName and domain
   WINDIFF  Compare the contents of two files or sets of files
   WINMSD   Windows system diagnostics
   WINMSDP  Windows system diagnostics II
   WMIC     WMI Commands
X
   XCACLS   Change file and folder permissions
   XCOPY    Copy files and folders
   ::       Comment / Remark*

* These commands are built into the CMD Shell, all others are seperate exe files that are cmd based apps that can be run from other software other than CMD.